Importing electronic lockbox files is accomplished using the Accounts Receivable Payment Processing function. Deposits are made as any other normal payment batch. Follow the instructions below to process an electronic lockbox file.
The examples provided in this section are using the Generic Lockbox file format. This file type requires an invoice number be provided in the electronic file.
Create a Lockbox Payment Batch
- Navigate to the Main Application menu tree and select the Accounts Receivable / Payment Processing menu option.
- Create the Payment Batch Header – The Payment Processing Batches form opens. Click the New button located at the lower right of the form to begin a new payment batch.
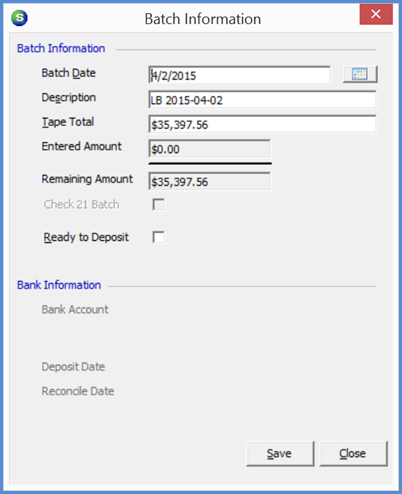
- Enter Payment Batch Header Information – The Batch Information form opens. Enter the Batch Date, Description, and the Tape Total (total amount of payments contained in the lockbox file being processed). Click the Save button when finished.
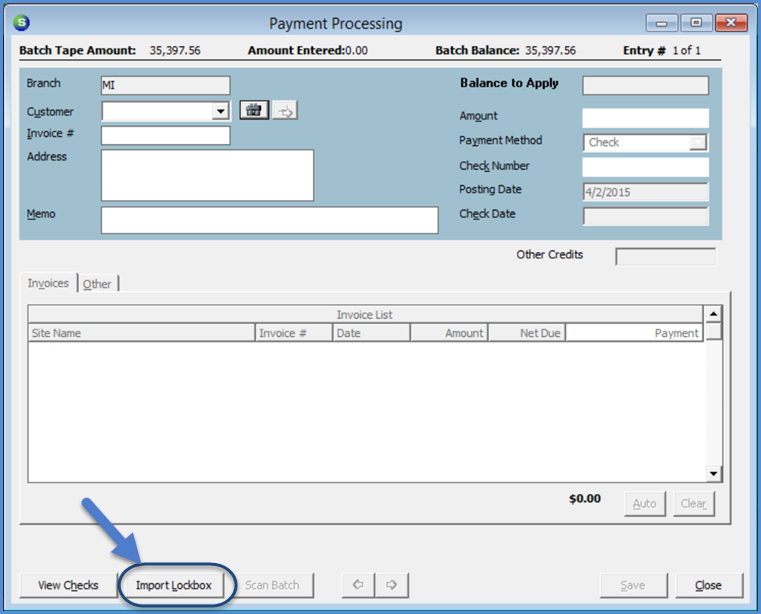
- Once the batch header has been saved, the Payment Processing Batches list opens again; the new batch appears in the batch list. To import the lockbox file, double-click on the batch or highlight the batch and then click the Enter Payments button located at the lower right of the Payment Processing Batches form.
- Click the Import Lockbox button located at the lower left of the Payment Processing form.
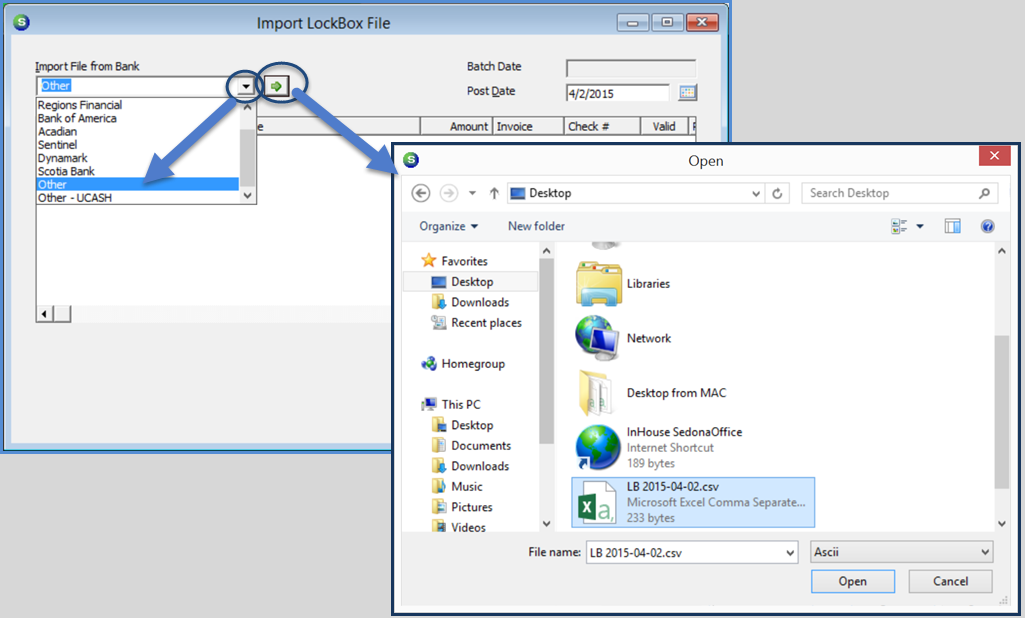
- The Import LockBox File form opens. In the Import File from Bank field, select the appropriate bank file format then click the green arrow to the right of this field. If your company is using the generic file layout, select the file format of "Other".
- The Windows File Explorer will open; locate where the import file is located, then click the Open button located at the lower right of the window.
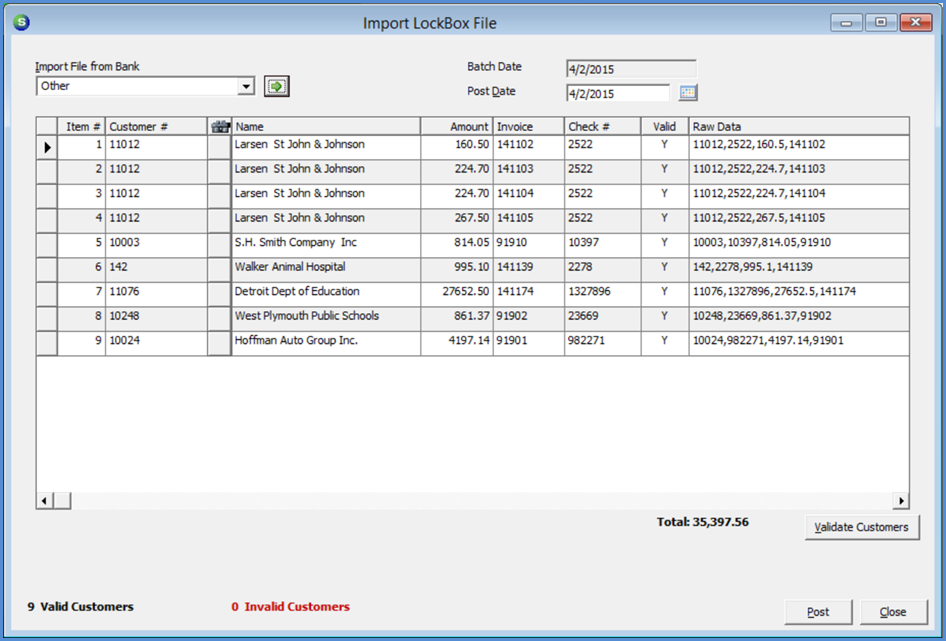
- The electronic lockbox file information will fill into the grid area of the Import LockBox File form. At the lower left of the form displays the count of valid customer numbers within the file. If all customers are valid, click the Post button located at the lower right of this form. The posting process creates the individual payment records for the batch.
If there are any records with invalid customers, you have a few choices in handling exceptions:
- Post the batch, which will only include the payment rows where the customer information is valid.
- Stop and research the unknown customer payment records, and then make the necessary corrections once the correct information is located.
- Change the Unknown customers to your Cash Account customer number, post the payment batch, and then research the errors at a later time. Once the valid customer number is identified, the payment can be transferred from the cash customer to the correct customer account.
Click this link for more information on handling invalid transactions.
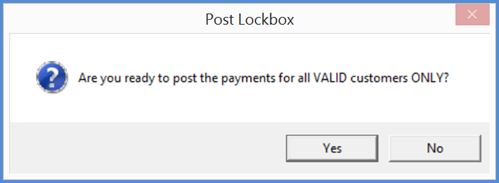
- After clicking the Post button, a confirmation message opens. Click the Yes button to proceed. A status box is displayed as the batch is being processed into payment records. The import may take some time depending on the number of records in the file. A file with approximately 500 records will typically take about five minutes to post.
- Once the payments have posted, the Payment Processing form opens. You can view a list of the checks prior to depositing the batch by clicking the View Checks button located at the lower left of this form.
- Depositing a Lockbox payment batch follows the same process as a regular payment batch.