Follow the instructions below to create a purchase order.
- Navigate to the Main Application Menu and select Accounts Payable/Purchase Orders. The Purchase Order List opens.
- Click the New button located at the lower right of the Purchase Order List.
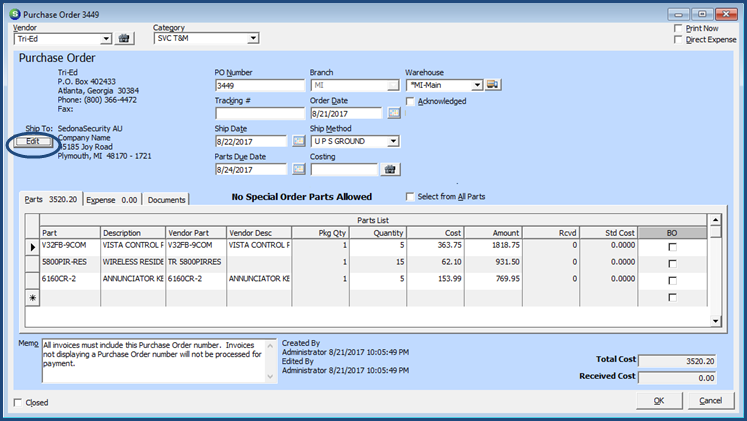
- The New Purchase Order form opens. Fill in the Header information. For descriptions of each field contained in the Header area refer to the Purchase Order Form Definitions topic.
- If ordering parts, select the needed part(s). For additional parts advance to the next line and enter the part information fields. For descriptions of each field contained on the Part form, refer to the Purchase Order Form Definitions topic.
If ordering expense items, navigate to the Expense tab and enter the needed expense items. For additional expense items, advance to the next line on the expense tab and enter the expense information fields. For descriptions of each field contained on the Expense form, refer to the Purchase Order Form Definitions topic. - In the footer section of the PO form, you can enter a Memo if desired. Up to 256 characters of information can be entered into this field. This information will print on the Purchase Order.
- If a document needs to be attached to the purchase order, click the Apply button then navigate to the Documents tab and either scan in and attach a document or add an existing saved document. If no documents are being attached, proceed to step number 7.
- Once all information is entered, click the OK button located at the lower right of the form to save the purchase order.
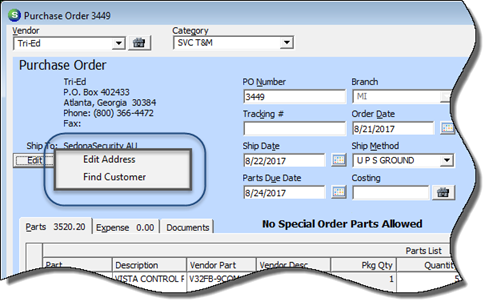
The Ship To Address can be changed if necessary by hovering the mouse over the words Ship To: in the Header of the PO form, right-click and select Edit Address. You can also click on the Edit button shown below the Ship To label in the PO Header.